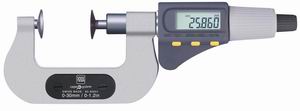
MICROMASTER
Manufacturer:
- Hexagon MI TESA (Switzerland)
Main features and specifications:
- two measuring surfaces in the form of disks with a diameter of 20 mm to measure the distances between the tangents to the tooth W k by the initial diameter, the distance between groove and groove, and other hard-to-reach places;
- measuring spindle with linear movement - without spindle locking;
- digital scale resolution 0.001 mm / 0.00005 inches;
- RS-232C interface;
- flatness 3 μm, non-parallelism 6 μm, permissible error 4 μm;
- digital scale resolution 0.001 mm / 0.00005 inches;
- other specifications: as in the standard MICROMASTER micrometer model.

Micrometers MICROMASTER series
| Type | Measurement range, mm / inch |
| 60.30041 | 0…30 / 0…1,2 |
| 60.30042 | 25…55 / 1…2,1 |
| 60.30043 | 55…85 / 2,1…3,35 |
| 60.30044 | 85…115 / 3,35…4,5 |
Product catalog
Каталог измерительного инструмента TESA. 2015 год (pdf, 36`885 Кб)

