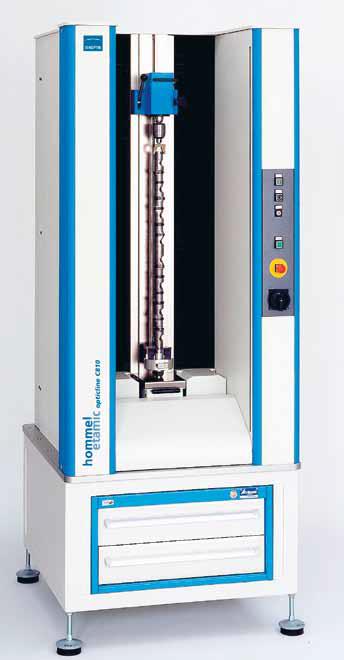
HOMMEL-ETAMIC Opticline C800
Manufacturer:
- JENOPTIK Industrial Metrology Germany (Germany)
Opticline shaft measuring instruments C800 are suitable for objects with a diameter of up to 140 mm, a maximum length of up to 850 mm and a weight of up to 20 kg. They are supplied in the form of a fixed installation or as an additional to the mobile device.
Due to its high measuring ability
when working with long objects and compact construction, the devices of this series are suitable for measuring a large range of objects such as camshafts, gear shafts, motor shafts and parts after turning or grinding.
The light barrier protective device allows for quick loading and unloading and, at the same time, guarantees maximum safety during the measuring cycle.
Features of the system:
- Effective measurements, high resolution for tight tolerances;
- The C800 series can be equipped with a light barrier device, which makes it possible to have an open structure for faster loading and unloading of parts;
- There is a version with a mobile stand for production facilities, which provides additional protection from the influence of the environment, as well as additional lockable compartments for storage of accessories and clamping devices.
Specifications:
| Model | С805 | С810 | С814 |
| Limits of measurement | |||
| Diameter, mm: | 0,2 - 50 | 6 - 100 | 0,2 - 140 |
| Length*, mm: | 850 | 850 | 800 |
| Dimensions | |||
| Diameter, mm: | 150 | 150 | |
| Length*, mm: | 850 | 830 | |
| Gravity, N: | 150 | 150 | |
| Resolution | |||
| Diameter, mkm: | <0,1 | 0,1 | |
| Length, mkm: | <0,1 | 0,1 | |
| Rotation, °: | 0,018 | 0,0018 | |
| Accuracy / MPE ** | |||
| Diameter, mkm: | 2 + D [мм] / 100 | ||
| Length, mkm: | 5 + L [мм] / 100 | ||
| Repeatable *** | |||
| Diameter, mkm: | 0,5 | ||
| Length, mkm: | 3 | ||
| Speed | |||
| Measuring, mm/s: | Automatically optimized measurements: 10 - 80 |
||
| Measuring rotation, r/s: | 1 | ||
| Positioning, mm/s: | 200 | ||
| Positional rotation, r/s: | 1 | ||
| Measurement time: | Depends on the type and number of test characteristics usually 3 … 30 s |
||
| Dimensions of the measuring system [WxDxH], mm |
780х875х1452 | ||
| Mass of the measuring system, N: | 2 700 | 2 750 | 2 850 |
| Interfaces of clamping devices | |||
| The lower Morse center: | МК 2 | ||
| The Morse cone: | МК 2 | ||
| Upper Center: | Manual, 20 mm | ||
| Source of power | |||
| Connection | AC-PH, N, PE | ||
| Voltage, V: | 230 / 115 | ||
| Frequency of mains, Hz: | 50 / 60 | ||
| Power consumption, kVA: | 1,5 | ||
| Fuse, A: | 16 | ||
* - Between the tips of the standard supply set. The length can be reduced depending on the clips.
** - Surface of polished part, ambient and object temperature 20°C ± 1°C.
Changes in ambient temperature of less than 0.5°C/h, in accordance with DIN EN ISO 10360 or VDI / VDE 2617.
Mechanical environmental conditions according to DIN EN 30721-3-3, class 3M2.
*** - With 25-times measurements on the surface of polished parts (according to VIM).
Accessories and clamping devices:
There is a wide choice of clamping devices, which guarantees reliable fastening of the shafts. Flexible holders MK 2 (with a cone of Morse 2) allow you to adapt the system to measure different objects.
Below are the most commonly used fasteners and clamping chucks:

- Various fastening tips;
- Variants of fastening inserts;
- Clamping chucks and face plates.


