HOMMEL-ETAMIC WAVELINE W10
Manufacturer:
- JENOPTIK Industrial Metrology Germany (Germany)

HOMMEL-ETAMIC WAVELINE W10
Model of 2013, replaced the world-famous modification of Hommel-Tester T1000. This device used the most modern technology instrumentation.
Independent from the network device for mobile and stationary measurement of surface roughness, accuracy class 1 (highest) according to DIN 4772.
Independent from the network device for mobile and stationary measurement of surface roughness, accuracy class 1 (highest) according to DIN 4772.
| Accuracy class according to DIN 4772: | 1 (highest) |
| Measuring range/Resolution: | 320 microns (-210 / + 110) / 5 nm |
| Probe: | inductive, 2 mkm / 90⁰ (Optional - probe with extended range T3E) |
| Units of measurement: | mkm / mkinch (optional) |
| The maximum length of the tracing, mm: | 17,5 |
| The length of the tracing according to ISO / JIS, mm: | 1,5 / 4,8 / 15 |
| The length of the tracing according to MOTIF, mm: | 0,64 / 3,2 / 16 |
| Cutoff step mm: | 0,08 / 0,25 / 0,8 / 2,5 |
| Filters: | EN ISO 11562: Gaussian filter, EN ISO 16610-21: Gaussian filter, EN ISO 13565-1:Rk filter parameters EN ISO 3274: λs filter |
| Speed of tracing, mm / sec: Return speed, mm / sec: 3 |
0,15 / 0,5 / 1 3 |
| The interval between the points min, mkm: | 0.5 (9600 points with the path length 4.8 mm) |
| Battery Type: | Lithium-ion |
| Number of measurements per battery charge: | 800 (without print, with a length of tracing 4.8 mm) |
| Battery charging time, h: | 4 |
| Built-in Memory: | 2000 measurement cycles / options; 500 profiles |
| Measuring programs: | 7 measuring programs, 1 measuring program for testing |
| Operating temperature ⁰—: | +5 Е +40 |
| Dimensions H×W×L mm: The base unit The moving LV17 |
980 275 |
| Interfaces: | USB, Bluetooth |
| Power supply voltage, V: | 100 Е 264 |
| Measured parameters | |
| Roughness parameters, ISO 4287: | Ra, Rz, Rmax, Rt, Rq, RSm, Rp, Rv, Rq, Rsk, Rku, Rdc, Rdq,RzISO, Rmr, Rmr(c), C(Rmr) |
| Basic parameters of roughness, ISO 13565-1, -2: |
Rk, Rpk, Rvk, Mr1, Mr2, A1, A2, Rpk*, Rvk* |
| Parameters MOTIF, ISO 12085: | R, AR, Rx, CR, CL, Nr, CF |
| Parameters ASMB46: | Rpm |
| Parameters JIS B601 (2001): | Rz-JIS |
| Parameters DIN EN 10049: | RPc |
| Parameters Daimler MBN 31007: | R3z |
| Specifications of built-in printer | |
| Print Method: | Thermal matrix |
| Paper / print width, mm: | 57 ± 0,5 / 48 |
| The diameter of the paper roll, mm: | 31 |
| Resolution: | 8 dots / mm, 384 dots / line |
| Printing: | measurement conditions, the parameters of the roughness profile, Abbott curve, statistics. |
Functional features of roughness tester:

Ability of the longitudinal and transverse dimensions:
- Functional ability to rotate the probe to 90º for the extra dimension in the transverse direction.

Measurements in an inverted position:
- The ability to measure small items in an inverted position of tester;
- Contact with parts made of precision machined guide rollers on the bottom side of the block move.

Mobile measurement on small cylindrical parts:
- Reference prism measurement on shafts with diameters from 10mm;
- Reliable centering probe for measuring the roughness on the shaft.

Built-in legs for height adjustment:
- Retractable support legs to adjust the height, for parts with a raised surface to be measured at low altitude;
- The ability to easily install profiler in position to measure the roughness.

Perpendicular measurement:
- The presence of three reference points on the rear end of the block displacement;
- Reliable fixation device when measured perpendicularly to the surface.

Built-in V-shaped groove on the control unit (base unit):
- It is designed to measure small diameter shafts directly to the base unit without the use of racks and special fasteners;
- It provides stability at mobile measurements.

Installation slot for storage and charging device of movement:
- Safe storage device of displacement;
- Protect the probe from the break;
- Always ready to use the device with automatic charging function in the installation nest.
The kit and elements of roughness tester:

The moving LV17:
- Easy change of the probe;
- Precise positioning on the details because the guide prism;
- Transparent protection probe with backlight function (patented), the measurement area;
- Wireless data transmission technology between the device of movement and the basic unit (Bluetooth).

- 8 stored measurement programs;
- Function keys for the 4 main functions;
- Evaluation of all major modern roughness parameters (see Tech. specifications);
- Opportunities for assessment established tolerance values (tolerance);
- Quick and easy entry of additional measurement parameters through the touch screen;
- Clear display of measurement results;
- Displays results on screen: roughness, profile view (profilogram), interactive Abbott curve (curve of the proportion of the material), general statistical functions.

Built-in roughness measure:
- Control roughness measure is securely stored in the main unit W10, it is protected from damage;
- Checking the meter at any time if necessary the operator;
- Stable accuracy of measurements;
- Preset measuring program to check the meter with the specified nominal value of the measure.

Built-in printer:
- Printing the measurement results at the measuring point;
- "Easy paper loading";
- Print measurement results with the error estimate Profile, Abbott curve, additional information and statistics.

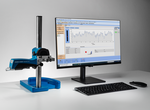
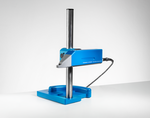
Stand with base HS300 (optional):
- Fully compatible with the standard version of the W10 (without adapter);
- Exact positioning of the probe on the surface of the workpiece;
- Setting range adjustment height - 300 mm;
- Rotator ± 180 ∞.

Software EVOVIS mobile (optional):
EVOVIS mobile - a program for the evaluation of roughness and contour.
The software is easy to use and offers a standardized interface for measuring roughness and contour, regardless of the configuration of the device. Simple icons are supported by integrated help function allows the user to use efficient tools of measurement and assessment in accordance with their own requirements.
Special abilities EVOVIS mobile:
- Specially designed software for work with portable measuring devices;
- Online mode: control W5, W10 or W20, connected to a PC, is done directly software;
- Offline mode: parameters and profile data stored in the memory of W5, W10 or W20, transferred to a PC for further evaluation by the software features;
- Individual creation of a plan for testing;
- Master of measurement conditions;
- More than 90 parameters for assessing the waviness and roughness in accordance with EN ISO 4287, as well as other national and ISO standards (ASME, DIN, JIS, Motif, etc);
- Free Design Printing Protocol;
- Electronic archiving of measurement protocols in pdf format and auto-save.
Product catalog
аталог продукц≥њ Waveline (pdf, 2`399 б)


